by Kathryn Grace Warren of Hill Lake Farm
This classic sourdough bread recipe is a staple of our household. Beginner-friendly and gut healthy, this loaf will quickly become your new favorite addition to every meal. Baking bread doesn’t have to be complicated but it does take some careful time and planning. It’s worth every minute when you get to experience your very own hand baked loaf, that you can trust is good for you and your family.

This post may contain affiliate links. Please read our disclosure policy.
Why is Sourdough Healthier than Industrial Bread?
Sourdough is more nutrient dense than industrial bread, and it has none of the suspicious fillers, or chemicals that are added to mimic traditionally made bread. This recipe is has a 24 hour fermentation time, start to finish, with may seem daunting but the actual working time is only about 45minutes spread out over the day. The secret to making sourdough a staple in your kitchen is letting it fit into your schedule—no rigid stretch-and-fold schedules required.
The long fermentation time is where all the real magic happens, and where industrial bread will always fall short. Traditional sourdough fermentation includes a complex bacterial culture that produces organic acids, partially predigests the grain, and unlocks minerals and vitamins that would otherwise remain bound. The long fermentation time required for sourdough isn’t just about flavor or texture—it’s about making the nutrients in grains meaningfully more bioavailable.
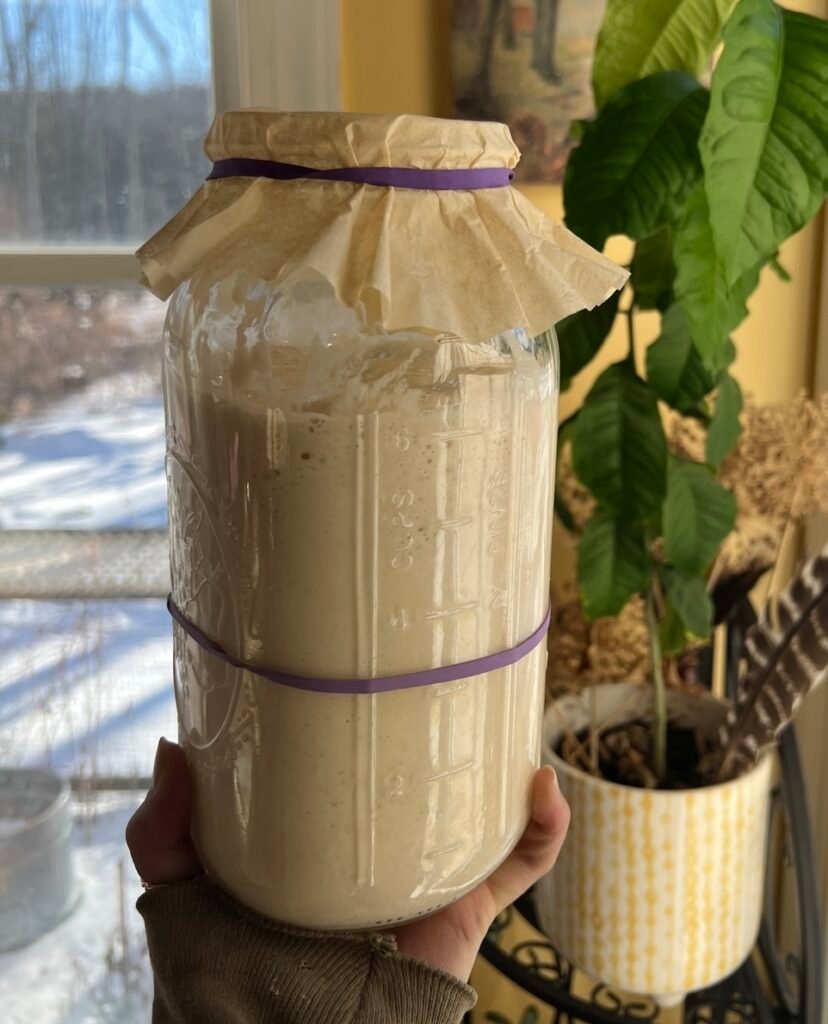
A sourdough starter is alive; its ability to ferment, strengthen dough, and create rise is directly tied to the health and diversity of its microbial community. Flour isn’t just an ingredient in this process—it’s the food source for those microbes.
Sourdough Fermentation improves mineral availability, enhances digestibility, develops complex flavor, and naturally preserves bread through long, slow microbial fermentation. It’s not just a fad that got popular over covid, but the original way all bread was made. To find out how you could benefit most from Sourdough Fermentation follow the link below and learn more.
Simple Ingredients:
Here are all ingredients you will need for the recipe:
- Bread Flour: high protein, organic flour. King Arthur Bread flour is my go to.
- Sourdough Starter: active & doubled
- Sea Salt: natural mineral salt ideally tested for purity
- Water: filtered water – non-chlorinated
What You’ll Need:
Bread making doesn’t have to be complicated, but it does help to have a few simple tools.
- Jar or container: for maintaining your sourdough starter
- Large Mixing Bowl: for mixing and bulk fermentation
- Kitchen Scale: for accurate flour and water measurements
- Proofing Basket (Banneton): or Round Basket or Small Round Bowl
- Clean kitchen towel or linen: to line the basket or cover dough
- Dough scraper or bench scraper: to handle and shape sticky dough
- Dutch oven or baking vessel with lid: creates steam for a good crust
- Parchment paper: – helps transfer dough safely into the hot pot
- Lame or razor blade: or sharp knife – for scoring the dough before baking
Optional:
- Bread Saw: countertop or handheld
- Silicone baking mat: handled baking mat rated for high heat
Try my favorite Sourdough Baking Essentials below:
Disclaimer: Some links on this site are Amazon affiliate links. If you make a purchase, we may earn a small commission at no extra cost to you. We only recommend products we trust. Your support helps keep Hill Lake Farm growing and allows us to keep sharing recipes, tips, and stories with you.
Watch this Step-by-Step Guide
Example Schedule:
This is my most typical baking schedule, but temperature will control the real fermentation time. The warmer it is the faster the dough will ferment and rise, and the closer the dough needs to be watched.
Night Before:
9:00PM: Feed Starter at least 75g flour / 75g water for one loaf.
First Day: Fermentation Day
9AM: Mix dough together until there is no dry flour.
9AM – 12PM: 3 sets of Stretch & Folds (30min-1hr apart)
12PM until 4-6PM: Bulk Fermentation(dough size should double)
4PM – 6PM: Shaping the Loaf
6PM: Cold Proofing in fridge overnight
Second Day: Baking Day
9AM – 12PM: Optimal baking time.
Preheat Dutch Oven for 30 minutes at 450°F.
How to Make a Classic Sourdough Loaf?
This recipe has a 24 hour fermentation time, & uses active sourdough starter. The summarized recipe card is below for seasoned bakers.
Step 1: Night before Mixing 8PM – 10PM
Feed starter the night before fermentation day, 75g of flour & 75g water between 8-10PM. Make sure your starter has been well fed prior to this feeding so the dough will ferment and rise properly.
Step 2: 9AM
Using a kitchen scale & large mixing bowl add sourdough starter & water. Remove bowl from scale & stir thoroughly to combine, breaking up any large chunks. A whisk or fork can be helpful in this step.
Step 3:
Next, put the mixing bowl back on the scale & add in bread flour & sea salt by weight. Remove from scale, & mix until totally combined. There should be no dry clumps of flour in the dough. If the dough seems very dry, you can add between 10-25g of additional water. Cover with a damp towel or a plastic wrap to retain moisture.
Note: the more water is added, the more sticky the dough will be & the more difficult it will be to shape.
Step 4: 9:30AM – 12PM
Let the dough rest for between 20 minutes to an hour before doing the first set of stretch and folds. Thoroughly wet your hand and grab the edge of the dough & fold it on top of itself. Turn the bowl as you go & continuously grab the outside edge of the dough turning it on top of itself each time to build tension in the loaf.
Repeat this step 2 more times, for a total of 3 sets of stretch & folds spaced out every 20 minutes to an hour. Your goal should be to have all the stretching pools done within three hours of mixing.
Note: waiting too long to stretch & fold will reduce the air in your loaf & produce a less fluffy loaf.
Step 5: 12PM until 4PM – 7PM
After stretch & folds, the dough will bulk ferment until it has doubled in size. This is why it’s important to use a large mixing bowl, so the dough has enough space to expand. When the dough will double in size, depends on the temperature, which will determine how quickly the sourdough starter will ferment.
Step 6: 4PM – 7PM
The last step before baking is to shape the loaf. This takes the most skill, but will make all the difference in the oven spring of your loaf. Prepare a proofing basket or bowl by folding in a clean kitchen towel and lightly flouring the inside.
Lightly flour a clean work surface & pour out the dough. Scrape down the sides of the bowl to remove any stuck dough. The easiest shaping method for a round loaf is to take the outside edge & fold it on top & repeat around the perimeter of the loaf about 4 times creating a seam. Flip the loaf seam side down, & then continue to work tension into the surface of the dough by gently pushing & pulling the dough ball back & forth. Use the outside edge of your hand to hold down the sides of the dough, & round out the loaf. Once the dough has a good shape, lightly flour the surface of the dough, & then transfer into a prepared proofing basket, seaside up, & flour seam.
Note: do not over flour your work surface – you want a small amount of moisture to help the dough stick to the work surface & create tension.
Step 7: Next Morning
Preheat your Dutch Oven to 450°F at least 30 minutes before baking.
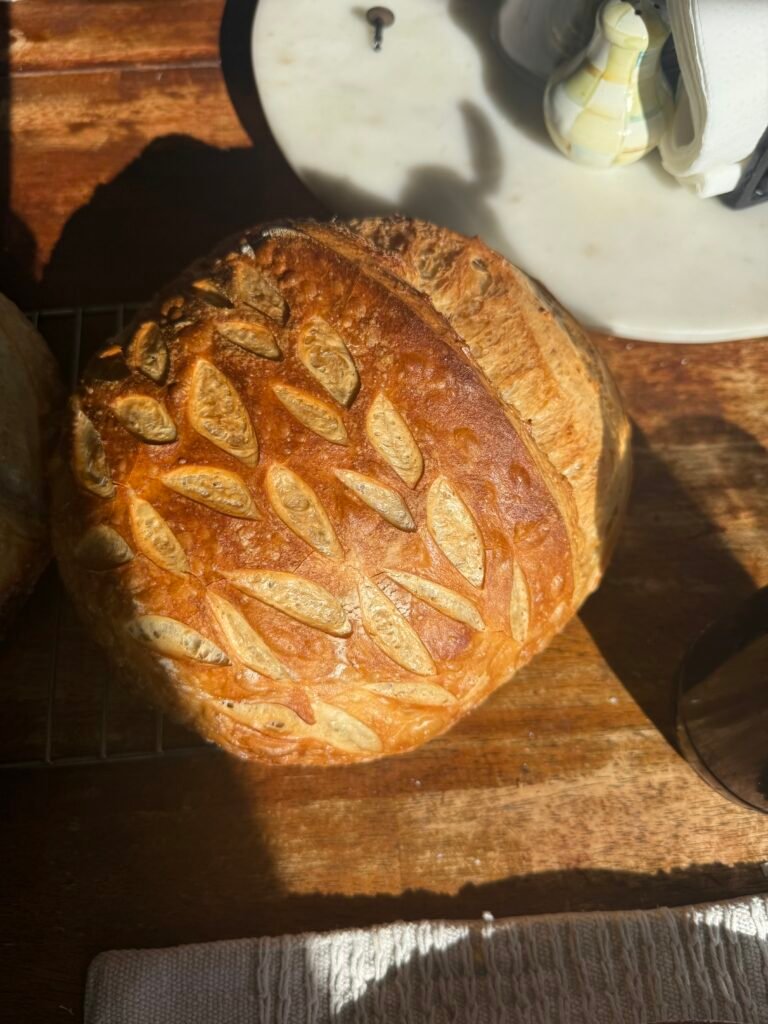
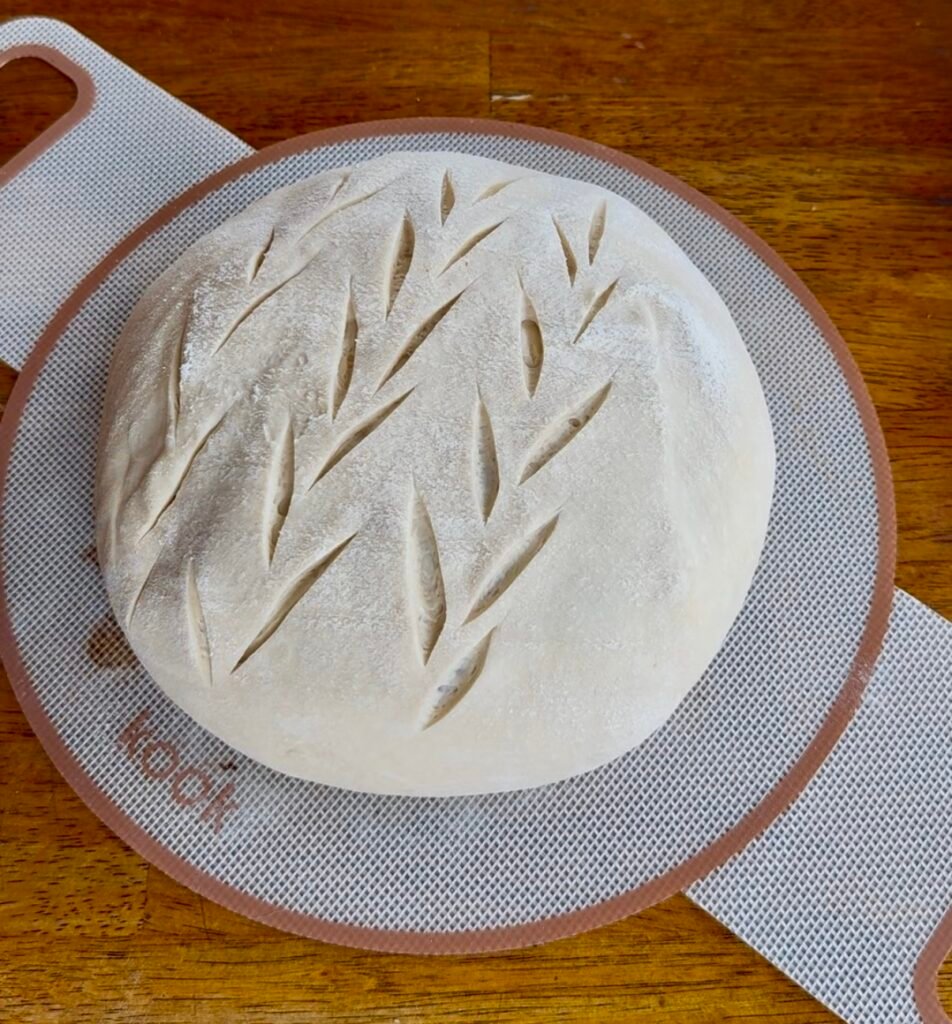
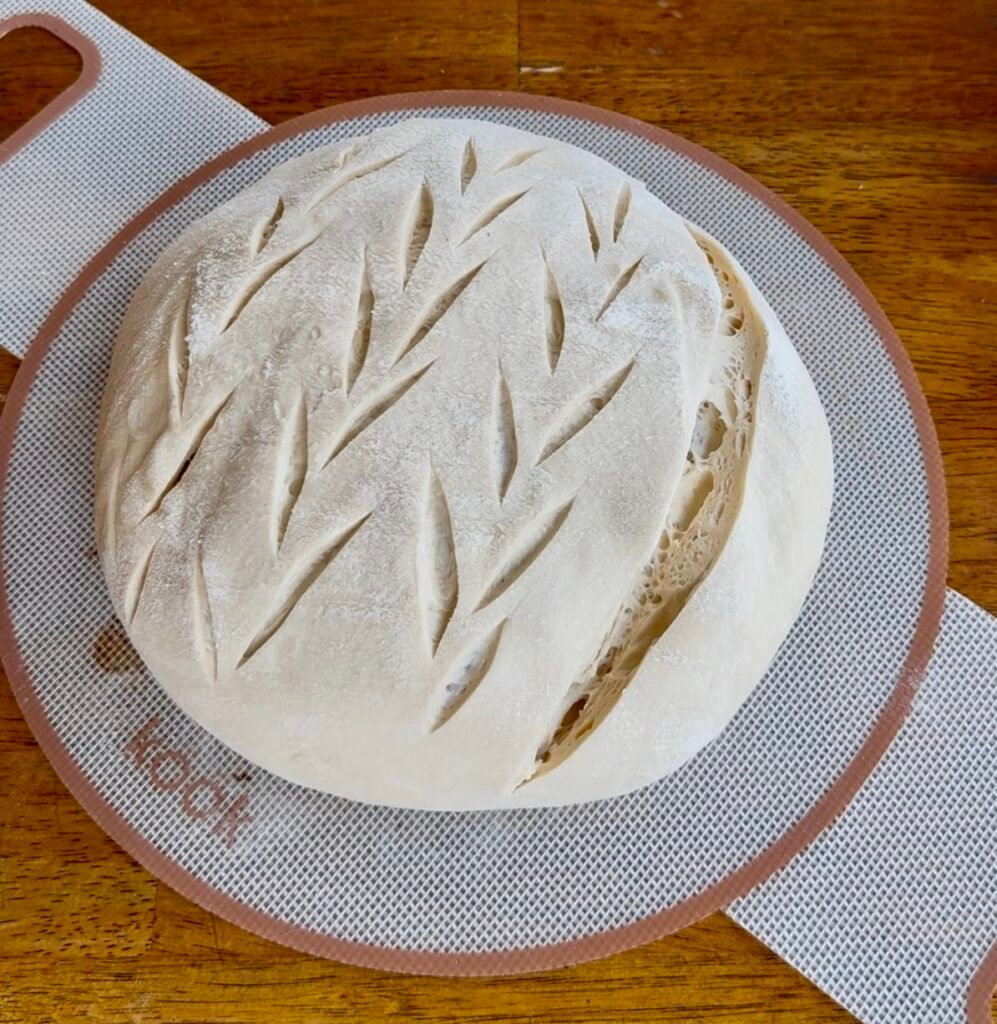
To prepare the loaf for baking it’s important to score the loaf to release tension in the dough as it expands in the oven. Turn the dough out onto a piece of parchment or silicone mat. If the surface of the dough is very damp, lightly flour. Add any intricate design work before the final score. Score the loaf along it’s length with a deep cut about ½” deep, in one quick motion. Spritz your loaf with water, & carefully transfer into the preheated Dutch oven using the parchment or silicone mat as a sling.
Note: The score acts as a controlled expansion joint preventing the bread from exploding. It’s best to use a razor or bread lame, as a sharp knife will not achieve the same effect.
Step 8:
Bake the loaf with the lid on for 30 minutes at 450°F. Then remove the lid & bake for an additional 10 to 15 minutes, depending on how crispy you want your crust. Remove from the oven & set on a cooling rack until room temperature.
Note: Do not leave the loaf in the dutch oven as it will continue to bake even outside the oven. Wait for bread to cool entirely before slicing or the texture will be chewy.
Common Sourdough Baking Terms:
Sourdough Starter
A sourdough starter is a living mixture of flour and water that naturally ferments, cultivating wild yeast and beneficial bacteria. This natural leavening culture produces gas and acids that allow bread to rise and develop the signature flavor of sourdough without commercial yeast. 🍞
Sourdough Discard
Sourdough discard is the excess portion of sourdough starter that is removed during routine feedings to maintain a manageable amount and keep the starter healthy and active. Discarding part of the sourdough starter helps keep the starter from growing too large, maintain a balanced ratio of flour, water, and microbes, and prevent the starter from becoming too acidic or weak.
Active Starter or Fed Sourdough Starter
An active sourdough starter is a starter that has been recently fed and is full of lively wild yeast and beneficial bacteria. It becomes bubbly, expands in volume, and is strong enough to naturally leaven bread dough. Well fed starter should double in size within 6-12hours depending on the temperature.
Bulk Fermentation
Bulk fermentation is the stage in bread making when the mixed dough is left to rest and rise as a whole before shaping. During this time, the yeast and bacteria in the dough produce gas and acids, which develop the dough’s volume, texture, and flavor. This is the most important step in trying to achieve a light and fully loaf.
Oven Spring
Oven spring is the rapid rise that bread dough experiences during the first few minutes of baking. As the dough heats up, the yeast produces gas and the trapped carbon dioxide expands, causing the loaf to “spring” upward and gain volume before the crust sets.
Stretch & Folds
Stretch & folds are a technique used in sourdough bread making to gently strengthen dough without heavy kneading. During bulk fermentation, the baker stretches a portion of the dough upward and folds it over itself, repeating this around the dough. This step is critical to building adequate tension in the loaf, which will prevent the loaf from falling flat.
Scoring the Loaf
To score means to make shallow cuts on the surface of the dough just before baking. This allows the bread to expand in a controlled way during oven spring, creates decorative patterns on the crust, and prevents the loaf from bursting unpredictably.
Bread Lame
A bread lame is a small, sharp tool used to score or slash the surface of bread dough just before baking. It usually has a razor blade attached to a handle, allowing bakers to make precise cuts that control how the bread expands during oven spring and create decorative patterns on the crust.
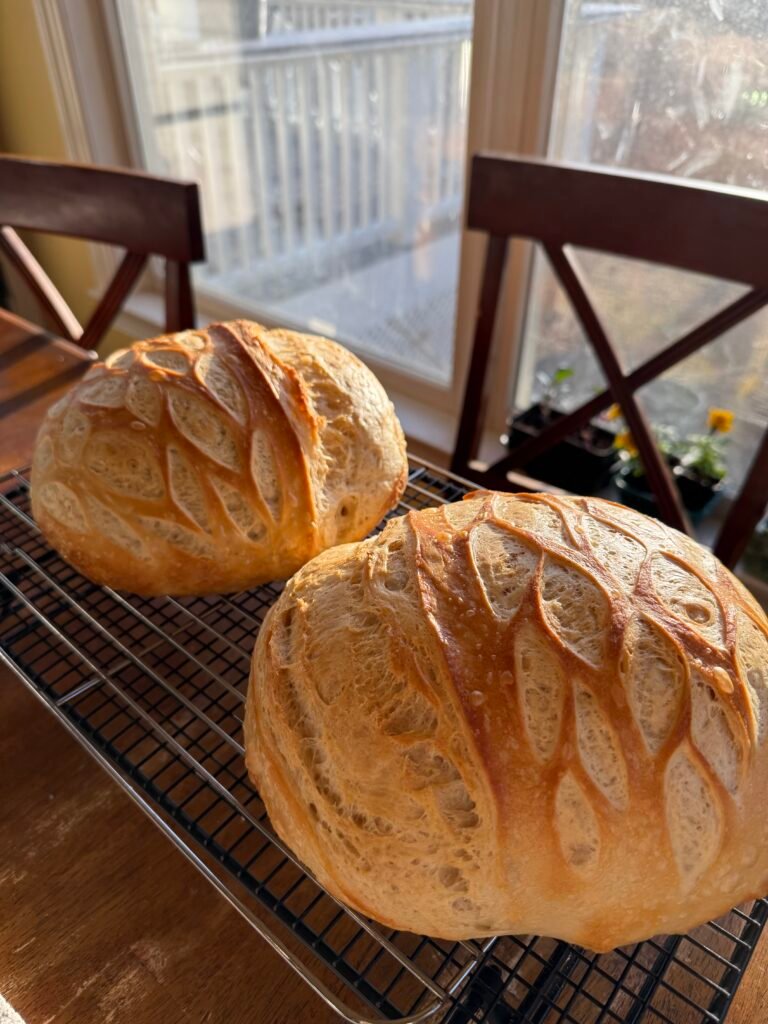
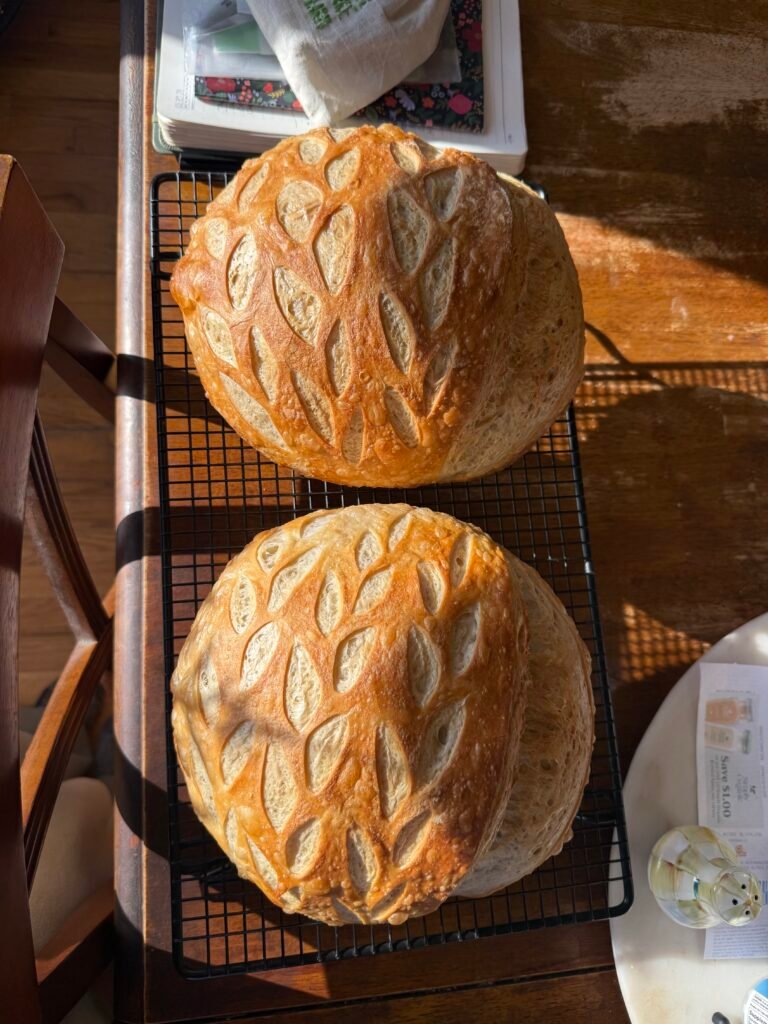
Beginner Sourdough Bread Recipe:
Classic Round Loaf
This artisan sourdough bread recipe uses simple ingredients and natural fermentation to create a crusty loaf with a soft, airy crumb that’s easier to digest and more gut-friendly. This two day recipe includes a step-by-step fermentation and baking schedule perfect for beginner or experienced bakers looking to break into sourdough. The First Day: fermentation & shaping, and the Second Day: baking & enjoying.
by Kathryn Grace Warren of Hill Lake Farm
LOAF SIZE: 850 grams
PREP TIME:
40 Minutes
COOK TIME:
45 Minutes
TOTAL TIME:
1 Day 45 Minutes
Equipment Needed:
- Mixing Bowl, Kitchen Scale, Proofing Basket, Bench Scraper, Dutch oven, Parchment, Lame or Razor for scoring
Ingredients:
- 100g Sourdough Starter (active)
- 350g Water (lukewarm) +10g if needed depending on dough hydration – 70%
- 500g Bread Flour
- 12g Sea Salt
Instructions:
1️⃣ Feed Starter at ~9PM 75g flour/75g water the night before you plan to ferment.
2️⃣ Mix Dough in the morning ~9AM. Using a kitchen scale, first combine starter & water until mixed, then add in flour & sea salt. Thoroughly mix dough until all dry flour is hydrated. Using a wet hand can help find & break up clumps. +10g water if the dough is still too dry.
3️⃣ Stretch & Fold sets should be 20 – 60 minutes apart (9:30AM-12PM). Thoroughly wet your hand & grab the edge of the dough & fold it on top of itself. Turn the bowl as you go & continuously grab the outside edge of the dough turning it on top of itself each time to build tension in the loaf. Repeat 2x, for 3 sets total.
4️⃣ Bulk fermentation (12PM until 4PM-6PM) Cover the dough & let it rise at room temperature for 4–6 hours, until it’s light, airy, & doubled in size.
5️⃣ Shape Dough (4PM-6PM) Pour dough out onto a clean, floured work surface. Gently fold the edges of the dough underneath to form a tight, smooth round dough ball, then place it seam-side up in a floured proofing basket or bowl to rise. Cold proof in the fridge overnight.
6️⃣ Preheat oven to 450°F at least 30 minutes before baking. Right before baking, score the loaf along it’s length with a uniform cut. Spritz with water & place in the dutch oven.
7️⃣ Bake the loaf with the lid on for 30 minutes at 450°F. Then remove the lid & bake for an additional 10 to 15 minutes.
8️⃣ Cool the loaf on rack for about 30min, or until room temperature & Enjoy!
Tips:
- Bread can be frozen whole & reheated in the oven or sliced for individual pieces perfect for toast. Store bread in a moisture sealing container like a plastic bag or waxed bread bag.
